Force Byte
Knowledge and
Techniques of Data Input in Excel (5)
0 Photo
If you need to use a particular series of data frequently, you can customize an auto-fill list to facilitate future use.
I will show you how to customize the following auto-fill list:
"CP", "DCP", "SACP", "ACP", "CSP", "SSP", "SP", "CIP", "SIP", "IP", "Prob IP", "SSGT", "SGT", "SPC", "PC"
1. Click the "Options" command on the "Tools" menu.
2. Click the "Custom Lists" tab (see Figure 1).
Figure 1
3. Move the mouse cursor to the "List entries" field and click once. A vertical-shaped cursor will appear in the field.
4. Input the following data in order (see Figure 2):
CP +
DCP +
SACP +
ACP +
CSP +
SSP +
SP +
CIP +
SIP +
IP +
Prob IP +
SSGT +
SGT +
SPC +
PC +
Figure 2
5. Press the "OK" button.
Now we can try to use the above custom auto-fill list.
1.Input "CP" (see Figure 3).
Figure 3
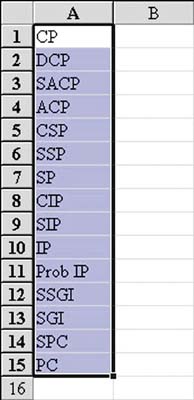
2. Drag the fill handle to the cell of A15 to get the following result (see Figure 4).
Figure 4
Besides, we can freely edit or delete the list. Here are the steps:
Edit the Custom Auto-Fill List
1. Click the "Options" command on the "Tools" menu.
2. Click the "Custom Lists" tab.
3. Select the list you want to edit from the "Custom Lists" field.
4. Edit the items in the "List entries" field.
5. Press the "OK" button.
Delete the Custom Auto-Fill List
1. Click the "Options" command on the "Tools" menu.
2. Click the "Custom Lists" tab.
3. Select the list you want to delete from the "Custom Lists" field.
4. Press the "Delete" button.
5. Press the "OK" button in the "Confirmation" dialogue box.
I will talk about how to input formula in Excel in the next issue. See you.
"Sharing IT as it applies to your daily life."
(E-mail address: ITB_ForceByte_Editor@police.gov.hk)
"Sharing IT as it applies to your daily life."
(E-mail address: ITB_ForceByte_Editor@police.gov.hk)


