Force Byte
How to Create a Document with Pictures in Word (2)

5 Photos

After reading the last episode, you have learnt how to insert a picture into your document. Today, I will teach you how to change its size.

In fact, there are two ways to do this in Word. Now let me introduce the easier method first.

Method 1

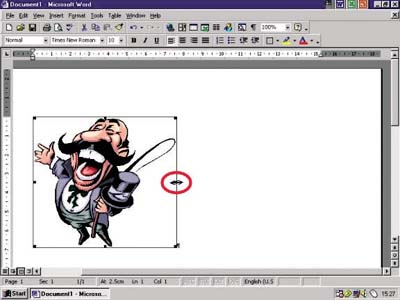
1. Left click your mouse to select the picture.

2. The selected picture is now displayed in a black frame.


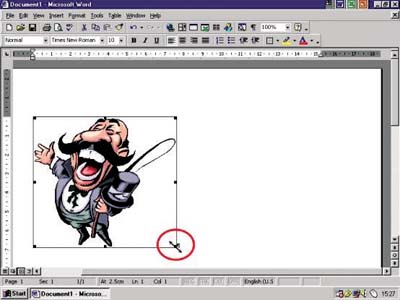
3. Point your mouse at any little black dot on the frame. When the mouse pointer changes to the shape of a two-way arrow (as indicated in the red circle), you can left click the mouse and simultaneously drag it to change the size of picture.


Although this method is simple and convenient to use, you should use the second method if you want to change the size of picture more precisely.

Method 2

1. Select the picture.

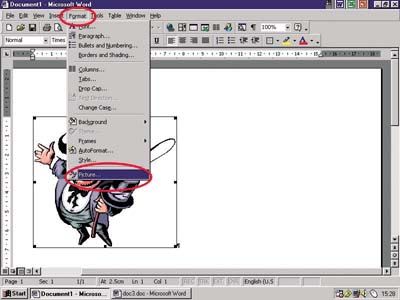
2. Choose the "Picture" option on the "Format" menu.


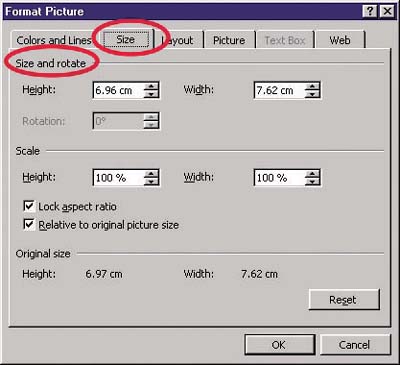
3. Click the "Size" tag on the "Format Picture" dialogue box. In the "Size and rotate" section, you can precisely change the size by inputting the exact values for "Height" and "Width".


4. That's all to it! Remember to press the "OK" button and get the result.

Next time, I will talk about how to change the position of your picture in Word.

"Sharing IT as it applies to your daily life."

(E-mail address: ITB_ForceByte_Editor@police.gov.hk)


<<Back to Features>> <<Back to Top>>